“The artwork doesn’t fit our dieline.”
A dieline is the printer’s template for the cut, fold and glue lines of a label or box. The artwork has to be built on that exact template, with bleed past every cut line, nothing important on folds or glue flaps, and the dieline itself kept on its own layer as a named spot colour, so it guides the cutter but never prints. A design made at the wrong size or on a generic template has to be rebuilt on the printer’s dieline.
Updated November 3, 2026 · by Azaan Ali, print designerWhy printers ask for this
Every printer and every box style has its own dieline: slightly different tuck flaps, glue widths and tolerances. Artwork drawn on a template from the internet, or on a picture of a box, won’t line up with their cutting die, so panels end up off-centre, text wraps round a fold or a logo lands on the glue flap.
Printers also need the dieline in a particular form: one layer, a named spot colour such as “Dieline”, set to overprint, with nothing else on that layer. A dieline that’s just part of the artwork gets printed onto the box.
How to set up label or box artwork on a dieline
- Get the dieline from your printer for the exact size and style you’re ordering, as AI or PDF.
- Put the dieline on its own top layer, coloured with a spot colour named “Dieline” (or what the printer asks), set to overprint. Lock it.
- Build the artwork on a layer underneath, extending backgrounds 0.125 in (3 mm) past every cut line.
- Keep text, logos and barcodes away from folds, glue flaps and the edges of each panel. Check which panel is the front when the box is assembled.
- Put white ink, varnish or foil on separate named layers if you’re printing on clear, kraft or metallic stock.
- Print the PDF at 100%, cut it out and fold it into a paper mock-up before you approve the proof.
Or send it to us
- Rebuild your artwork on your printer’s exact dieline, panel by panel
- Bleed, safe areas, folds and glue flaps all checked
- Barcodes placed with their quiet zones; ingredients and regulatory text kept legible
- White ink, varnish and foil set up as separate layers
- A flat PDF for the printer and a 3D-style mock-up for you to approve
Questions
- Where do I get the dieline?
- From your printer or packaging supplier: they generate one for the exact box size and style you order. If you don’t have a printer yet, we can draw a standard dieline, but always confirm it with the printer before production.
- How much does dieline setup cost?
- From $75 for a label or simple box with your existing artwork. Complex boxes and full ranges are quoted first, at a fixed price.
- Can you work from an AI-generated image of my box?
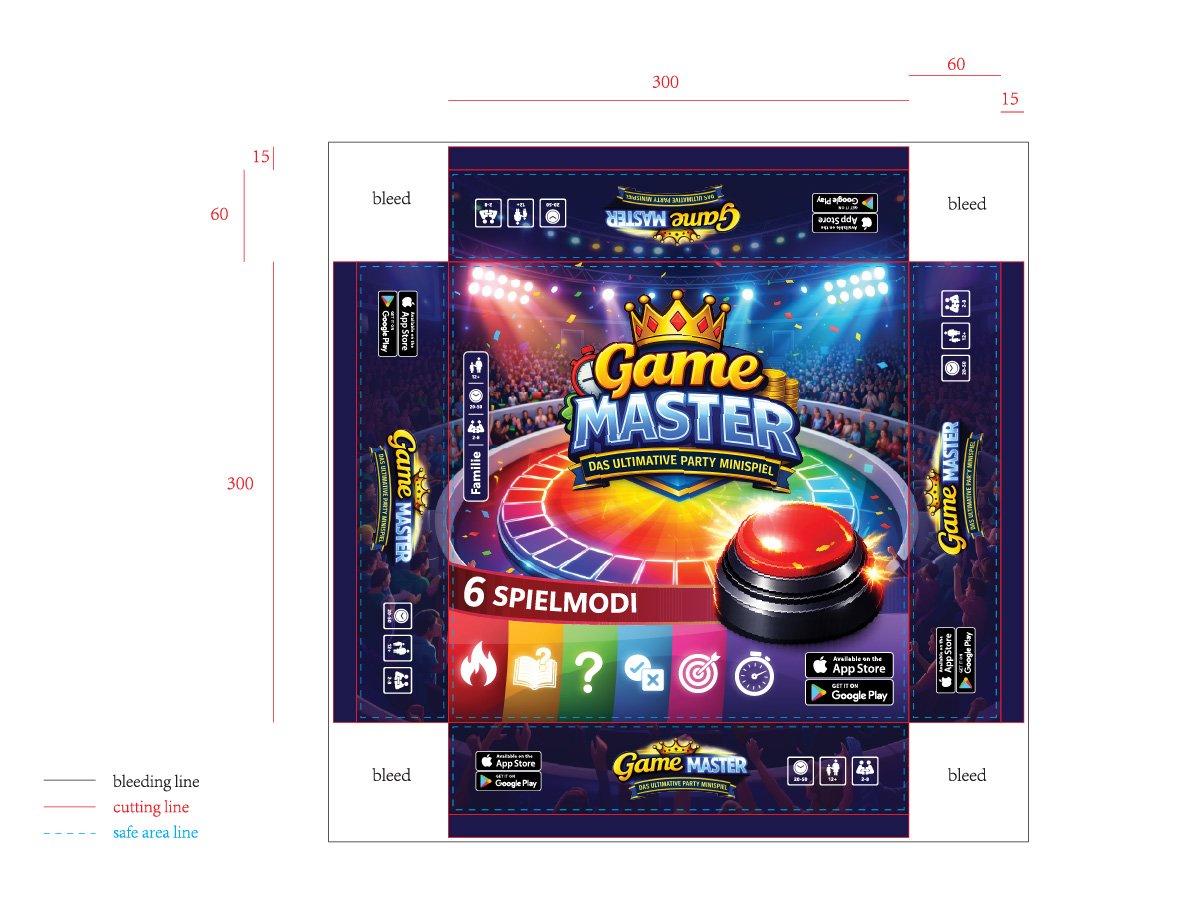
- Yes. We rebuild it as real, printable artwork on your printer’s dieline. That’s exactly what we did for the GameMaster board game box.
Terms on this page: Dieline, Bleed, Safe area (safe zone), Pantone (spot colour).
Other things printers say
More on this kind of work: Labels, stickers & packaging.
Send us the file.
Ask a question or send the file in the chat. A fixed price comes back within hours, and nothing starts until you say yes.